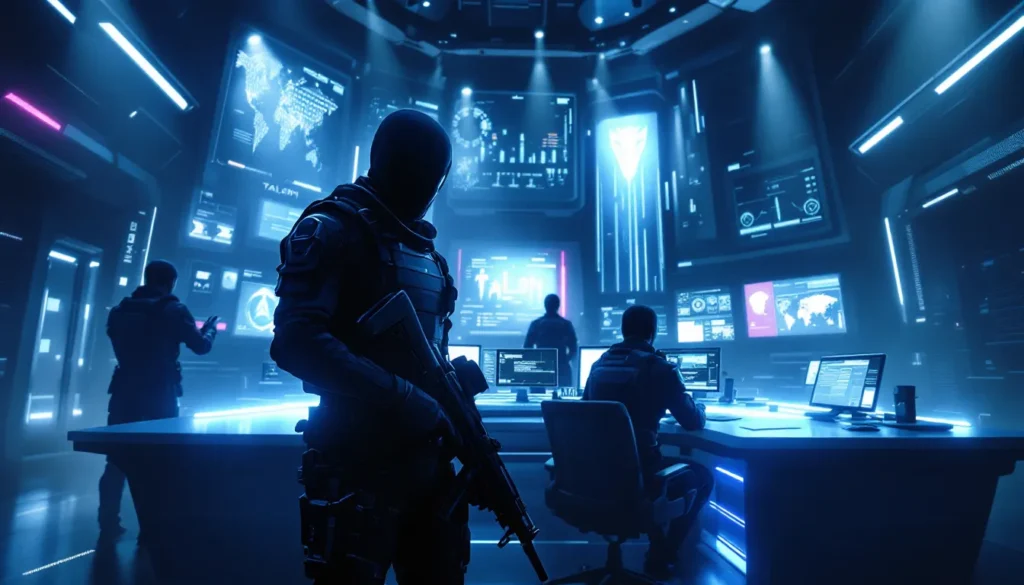

Hanamura is one of Overwatch’s most iconic payload maps, demanding precision, positioning, and team coordination at every rank. Whether you’re climbing competitive ladder or studying VODs of professional matches, understanding this Japanese-inspired map is essential. The map’s tight chokepoints and verticality create unique opportunities for both attackers and defenders, but only if you know where to set up, when to engage, and which heroes can leverage the terrain. This guide breaks down everything from fundamental map control to advanced ultimate economy management, giving you the knowledge to dominate Hanamura matches in 2026.
Table of Contents
ToggleKey Takeaways
- Mastering Hanamura requires understanding verticality, chokepoints, and team positioning to control the map’s tight spaces and multiple engagement angles.
- Ultimate economy is the deciding factor in Hanamura matches—attackers should commit only when ahead in ultimates, while defenders should save ultimates for reactive defense.
- The bridge and Point B catwalks are the strongest defensive positions on the map, making high-ground control essential for both phases of the payload push.
- Successful attack strategies involve securing early flanks, applying constant payload pressure, and forcing defenders to rotate between main choke and secondary threats.
- Avoid common mistakes like solo-pushing without team coordination, overcommitting to flanks, and ignoring ultimate advantages—discipline and reading the map win matches.
- Professional teams treat the payload as a tempo dictator rather than just the objective, using it to bait defensive rotations and create opportunities for coordinated pushes.
What Is Hanamura? Map Overview and Gameplay Basics
Map Layout and Key Locations
Hanamura is a hybrid map divided into two distinct phases: the payload push section and the point capture phase. The first half spans from the attackers’ spawn through a narrow bridge, past the temple entrance, and into the main courtyard, roughly 150 meters of tightly packed terrain. The second half branches into a more open point room where the payload deploys.
Key locations define the flow of combat:
- The Bridge: A narrow bottleneck forcing grouped engagements. High ground exists on both sides, making it a natural defensive stronghold.
- Temple Entrance (Point A): The courtyard leading into the main objective. Wide sight lines but multiple flanking routes through the side buildings.
- Point B Room: A spacious indoor arena with elevated catwalks on opposite sides. Vertical positioning becomes critical here.
- Payload Route: Winds through alleys and around structures, creating natural cover and choke opportunities.
The map’s verticality is deceptive. What looks like a dead-end path at ground level might have a ledge or rooftop access above it. Learning these alternate routes is the difference between predicting enemy movements and getting caught off-guard.
Objective Types and Win Conditions
Hanamura is a payload map, meaning attackers must escort the payload from start to finish, first through Point A, then to Point B. Defenders win by preventing the payload from reaching the destination within the time limit. Once attackers capture Point A, they advance to the next phase where the payload enters the temple interior.
Winning conditions vary by phase:
Phase 1: Attackers need to clear the bridge and courtyard, secure Point A, and push the payload past the temple entrance. Defenders hold by maintaining control of choke positions and forcing attackers to split resources between the payload push and high-ground skirmishes.
Phase 2: The payload moves through tighter corridors into the point room. Defenders typically set up on the catwalks for high-ground advantage. Attackers must push upward and inward simultaneously, a tactic that demands perfect ultimate timing and positioning.
The payload doesn’t move unless at least two attacking players are nearby without nearby enemy players, making stagger picks (eliminating enemies one at a time) a core defensive strategy. Similarly, attackers benefit from tempo plays, engaging defenders before they’re fully set, capitalizing on spawn disadvantage and fatigue.
Attack and Defense: Team Positioning Strategies
Attacking Hanamura: Routes, Flanks, and Engagements
Attacking Hanamura requires discipline about when to commit and when to reset. Committing too early means feeding ultimate charge to defenders: resetting too much wastes time and lets defenders stabilize.
Early Game Setup: Split your team into roles. Your main tank and one damage hero should path toward the bridge, pushing forward to test defensive positioning. Meanwhile, your second damage hero takes the high ground on the left side of the bridge (accessible through the left building) to establish pressure from an unexpected angle. Supports follow the main push, positioning 10-15 meters behind to stay safe while maintaining line of sight and healing range.
Bridge Phase: The bridge is a choke, but it’s not unpassable. Commit to engaging when you have ultimate advantage, a ready Zarya bubble, a Lucio beat, or a Reinhardt charge. The moment defenders are caught without defensive ultimates, your team should flood forward together. Don’t hold back: hesitation lets defenders reset their ultimate economy.
Common Flank Route: Through the left-side building and onto the temple roofs, attackers can pressure high-ground defenders with a coordinated diver or hitscan. This forces defenders to either rotate (weakening their main choke defense) or face a split fight.
Payload Momentum: Once Point A falls, maintain constant payload pressure. Defenders will attempt stagger picks on your way to Point B. Assume they will, and plan for it, post a second tank or damage hero on the payload path ahead of the pack, ready to defend the payload from surprise engagements.
Defending Hanamura: Holding Key Chokepoints
Defensive success on Hanamura depends on establishing control before attackers reach critical positions. Passive defense (waiting for attackers to come to you) usually loses because attackers dictate the timing and composition.
Bridge Positioning: Set up with your main tank at the bridge entrance, slightly forward. Position a hitscan (like Widowmaker or Tracer) on the right-side rooftop, where attackers often don’t expect danger. Your second tank or off-tank should hold the left-side high ground, ready to collapse on divers. Supports position behind the main tank, protected from direct fire.
Denial Strategy: Don’t let attackers settle into high ground for free. Early aggression, pushing toward attackers’ spawn if necessary, denies them time to set up their diver or ranged threats. If attackers commit to a full engagement, your goal is to trade health and ultimates favorably, then fall back through Point A.
Point A Hold: Once attackers breach the bridge, defending the courtyard and point becomes critical. Set up with height advantage, positioning on the temple ledges or interior rooftops. A Junkrat or Pharah here becomes nearly impossible to deal with for attacking hitscan. Your main tank holds a corner, protecting supports and allowing them to spam damage into the approach corridor.
Point B Setup: This is where vertical control wins fights. The catwalks are the strongest positions on the map. Stationary damage heroes (Widowmaker, Ashe, Junkrat) on the catwalks are devastating. Tanks should position to zone attackers away from the payload path. Defenders want to force attackers to either commit to a full team fight (where defenders’ height advantage shines) or give up on the push and reset, both favorable outcomes.
Best Heroes and Compositions for Hanamura
Top Tank Picks and Why They Excel
Reinhardt is the archetypal Hanamura tank. His shield and hammer excel in tight chokepoints where positioning matters more than range. On attack, Reinhardt dictates pace through his charge, pinning isolated defenders or creating space for the team. On defense, his shield protects positioning on the bridge, and his swing damage discourages close-range dives. The trade-off: he’s vulnerable to ranged spam and positioning mistakes are fatal.
Zarya thrives on Hanamura due to constant projectile spam in tight spaces. Both phases have natural barriers and cover that let her farm charge quickly. Her bubbles protect teammates during critical payload moments or rotate escapes. At high charge, Zarya can solo duel attacking divers, a massive advantage in map control. Teams that understand bubble timing and placement will dominate with her.
Wrecking Ball offers flexibility many teams overlook. On attack, he’s a mobile disruptor who can roll past the bridge, plant into defenders’ backline, and force rotations. His knockback denies high-ground positions. On defense, his mobility lets him collapse on flankers before they deal damage. The skill floor is high, but in competent hands, Wrecking Ball can solo-carry Hanamura matches.
Junker Queen saw a resurgence in 2026 due to her close-range dominance and ultimate’s team-fight potential. In Hanamura’s tight spaces, her leech passive sustains through spam, and her ultimate forces team fight decisiveness. But, she demands aggression and positioning discipline, passive play wastes her potential.
Support and Damage Heroes That Dominate the Map
Support Tier:
Lucio is meta-defining on Hanamura. His movement speed passive allows escape routes through tight spaces that other supports can’t access. His ultimate (beat drop) turns losing team fights into wins, especially critical on Point B where defenders have overwhelming height. His damage output also pressures ranged defenders on the catwalks.
Ana provides long-range pressure and anti-heal utility. On defense, her hitscan can pressure attacking divers from safety. Her sleep dart creates free kills on isolated tanks trying to push. The issue: she has no movement tool and Hanamura has many flank angles, making positioning critical.
Damage Tier:
Tracer is the premier dive damage hero. She uses the map’s chaotic pacing to dash between cover, stay out of direct fire, and apply consistent pressure. On attack, she can secure early picks on rooftop defenders or bypass the bridge entirely, creating distraction. On defense, she bullies vulnerable supports and picks off isolated targets before they reach the point.
Widowmaker is situational but devastating in the right hands. On defense, her vantage points on the bridge and catwalks command map control. But, she’s vulnerable to dive on Hanamura and requires setup and protection. Most teams default to Tracer or Genji for consistency.
Junkrat punishes bunched defenders and attackers alike. On Point B specifically, his grenades arc over cover and into the interior where tanks can’t protect. The indirect damage ignores shields, making him a natural answer to Reinhardt or Zarya stacks. The drawback: he’s slow and vulnerable to mobile threats.
Genji rounds out aggressive damage compositions. His mobility mirrors Tracer’s strengths with different engagement angles. His ultimate is transformative in team fights, especially when enemies are grouped. Teams with strong Genji players can skip traditional tank play and go full dive, relying on flanks and aggression.
Advanced Tactics: Ultimate Economy and Team Fights
Managing Ultimates in Hanamura’s Tight Spaces
Ultimate economy wins Hanamura matches at every rank. Because the map funnels fights into chokepoints, defending teams often get ultimate value by simply holding ground and letting attackers feed damage into their shields and abilities.
Attack-Side Economy: Attackers should avoid wasting ultimates on failed fights. If defenders have Zarya at 90% charge and a full Lucio ultimate available, committing your Zarya ultimate into them is a coin flip at best. Instead, apply pressure with non-ultimate damage, farm your own charge, and commit when you have a clear advantage, two or more active ultimates versus one or none. This sounds basic but it’s where most ladder teams fail.
Payload momentum also matters. Once you’re pushing the payload onto Point A or into Point B, your opponent is in a losing race. They must commit to stopping you, which means using ultimates. This is when attackers want to be at ultimate parity or ahead, forcing defenders to spend resources while the payload creeps forward.
Defense-Side Economy: Defenders should almost always hold ultimates for defensive use. Lucio’s beat drop is more valuable as a reactive save than as an opening. Zarya’s ultimate is most effective as a “get out” tool, slowing pushes and buying time for respawns. Teams that use ultimates proactively on defense often find themselves at a disadvantage when the real attack comes.
Stagger plays help too. By landing one kill on an attacking hero, defenders get a numbers advantage for the next 20 seconds (before the killed player respawns). Even if attackers get a pick back, the tempo advantage resets. Multiple stagger picks compound into huge ultimate advantages.
High-Impact Team Fight Setups and Pivot Plays
Team fights on Hanamura have few neutral ground options. Almost all engagements favor either the attackers (if they’re coordinated) or defenders (if defenders control terrain).
Attacking Team Fight Setup: Secure a flank first. Have your Tracer or Genji land an early pick on a support or isolated defender. With a numbers advantage (6v5), your main team pushes through the choke with ults ready. This isn’t heroic gameplay: it’s practical. Getting a pick before committing your team to a choke fight makes you the aggressor, not the victim.
Once engaged, attackers want to spread defenders vertically. If defenders are all on the same level, Junkrat’s grenades or Pharah’s splash damage becomes oppressive. If some defenders are upstairs and others downstairs, they can’t protect each other, and isolated targets die fast.
Defending Team Fight Setup: Let attackers come to you but don’t let them set up for free. Post a roamer (off-tank or a ranged damage hero) to harass attackers 10-15 seconds before the expected engagement. Force them to use utilities and ultimates early, then fall back and set up your main defensive position. When attackers commit, you’re already positioned and they’re half-resources down.
Pivot Plays: Sometimes the optimal move is to abandon a losing team fight and reset. If defenders crack your front line on the bridge and you’re in a losing 4v4 scenario with no ultimate advantage, immediately disengage. Fall back to Point A, reset, and re-engage when respawns arrive. Losing one team fight and resetting is better than getting wiped trying to salvage it.
Common Mistakes and How to Avoid Them
Mistake 1: Solo-Pushing Without Numbers
This is death on payload maps. Attackers who push ahead of their team get picked off, and one pick often spirals into a teamwipe. Discipline is boring but necessary. Stick with your team, engage together, and move as a unit.
Mistake 2: Overcommitting to Flanks
A flank sounds good until your team loses a 5v5 at the main choke while your Tracer 1v2s on the rooftop. Flanks should complement the main push, not replace it. One flank player maximum, and they should disengage if the main fight looks unwinnable.
Mistake 3: Ignoring Ultimate Advantage
Teams that default to engaging when ultimates are down instead of farming and waiting lose matches they should win. Check the tab menu. If enemy Zarya has ult and yours doesn’t, you’re probably going to lose that fight. Wait, farm, then engage when you’re ahead.
Mistake 4: Stacking Defensive Ultimates
Defenders often panic and use two ultimates in one team fight, say, Lucio’s beat drop and Zarya’s grav drop both on one attacking push. One would have been sufficient. This wastes ultimate economy and leaves defenders defenseless for the next push. Coordinate ultimate usage: redundancy is wasteful.
Mistake 5: Static Positioning
Defenders who hold the exact same corner for three consecutive pushes get out-positioned by smart attackers. Mix it up. Some pushes, sit on the bridge. Next push, play more aggressively and harass near attackers’ spawn. Unpredictability is a defensive advantage.
Mistake 6: Not Reading High Ground
Players who ignore high ground threats die to them repeatedly. Before engaging, scan for enemy hitscan on rooftops. If Widowmaker has vantage point, prioritize eliminating her or denying her positioning. Ignoring her is like giving a free ultimate farm to the enemy team.
Pro Tips from Professional Overwatch Matches
Professional teams approach Hanamura with specific playbooks refined over thousands of matches. At the highest level, meta compositions vary regionally and seasonally, but certain principles remain constant.
Bridge Engagement Timing: Pro teams rarely engage on the bridge unless they have a significant advantage. Instead, they rotate through building flanks (the left or right side paths) to get teammates into positions where defenders must choose between main choke defense and flank defense. By the time defenders rotate, attackers are already pushing the payload. This is higher-level gamesense than raw mechanical skill.
Catlawk Denial: Professional defenders often sacrifice the catwalks on Point B to set up ground-level zones instead. Why? Attackers expect catwalks to be occupied, so they bring Tracer, Genji, or Pharah to deal with them. By not being there, defenders bait attackers into poor positioning, then punish them at ground level. This requires trust in your team’s ultimate and positioning discipline, not just mechanical outplay.
Payload Pressure as a Resource: The best attacking teams use the payload as a tool to dictate tempo. Once the payload is rolling, every 10 meters it moves is time saved and pressure applied. Defenders are forced to rotate or commit to stopping it. This creates opportunities for flanks or high-ground pushes elsewhere. The payload isn’t the objective, it’s bait.
Mirror Picks and Flexibility: Pro players don’t always run the theoretical “best” composition. If the enemy Junkrat is winning with spam, a pro team will mirror with their own Junkrat to match it. Flexibility and responsiveness matter more than stubbornly executing a pre-planned comp that the enemy has prepared for. This is why patch notes matter, when a hero shifts 5% in power, pro teams adapt faster than ladder players realize.
You can see some of these concepts in action through esports coverage on Dexerto, where analysts break down professional match replays. Also, IGN provides updated patch notes and meta analysis as the season evolves. For deeper feature coverage on how Hanamura’s design impacts competitive play, Polygon occasionally publishes retrospectives on map evolution.
Conclusion
Hanamura rewards teams that understand verticality, respect ultimate economy, and resist the temptation to force engagements without advantages. There’s no hidden trick, just disciplined positioning, team coordination, and reading the map’s chokepoints to dictate fights in your favor.
The meta will shift with patches and balance changes. New hero releases might redefine optimal compositions. But the fundamentals, spawn advantage management, flank denial, payload discipline, will remain constant. Whether you’re a support learning high-ground defense or a tank managing aggression, mastering these principles translates across skill ratings.
Start applying one or two insights from this guide in your next Hanamura match. Focus on reading ultimate advantages before committing, or practice identifying flank routes beforehand. Small improvements compound into consistency, and consistency wins ladder points. Good luck out there.